Epson
– Get Started in Minutes! Step-by-Step Guides for Easy Installation and Printer Management.
– Get Started in Minutes! Step-by-Step Guides for Easy Installation and Printer Management.
Epson Printer Setup
With the Epson Connect printer which is a cloud-based printing technology, customers can use an Epson printer setup to print, scan, and share documents almost anywhere. It provides versatility for printing from PCs, tablets, and cell phones with features including Epson Email Print, Remote Print, and Scan to Cloud. Epson connect printer setup utility works with common cloud storage providers and supports a number of file types. Perfect for home and office usage, it facilitates wireless and remote printing to increase productivity and make managing printing activities on the move simple.
Epson Connect Printer Setup Utility
The Epson Connect Printer setup is a software program designed to improve Epson printer performance. Customers may use a computer or mobile device to remotely monitor and adjust their printer settings. This program makes it simple for users to check ink levels, adjust printing parameters, and carry out maintenance procedures including print head cleaning. Additionally, it enables cloud-based printing, which enables users to send files straight to the printer from anywhere in the world to print documents and images. All things considered, Epson printer management is made easy and effective with the Epson wireless printer setup.
Several Ways to Setup Epson Printers
There are several ways to set up an Epson printer, depending on the model and the requirements of the user. Here are a few such techniques:
- Printer Control Panel Wi-Fi Setup:
- Direct Setup: Navigate to the Wi-Fi settings and choose your network using the printer’s control panel. The printer will attach to the network once you provide WiFi keyword.
- WPS (Wi-Fi Protected Setup): To establish an automated linking, press WPS switch on router and then the corresponding WPS option on printer.
- Epson Connect Configuration:
Epson Connect Printer Configuration Tool Install the Epson Connect software on your PC after downloading it. To register for Epson’s cloud printing services and connect the printer to your network, follow the on-screen instructions.
- Ethernet or USB wired setup:
- USB Connection: Use a USB connection to connect the printer straight to your computer. Usually, the computer will detect the printer on its own and ask you to install the necessary drivers.
- Ethernet Connection: Use an Ethernet linking to join the printer to network. Install the required software and drivers to finish the setup.
- Mobile Setup:
- Copy the Epson iPrint app to your smartphone. To find and establish a WiFi connection with the printer, use an app.
- For iOS devices using AirPrint, make sure the printer and iOS device are associated with the matching network. From the print option on your iOS device, use AirPrint directly.
- Configuring an IP manually:
You may manually configure the printer’s IP address via the control panel or during the computer installation process if your network has a static IP address.
- Installing drivers with a CD or download:
- Get the latest drivers from the Epson website or use the CD that came with the printer. Following the instructions is necessary while installing the drivers and finishing the setup.
- Customers may connect their Epson printers in a way that best suits their needs and environment thanks to the flexibility these methods provide.
Epson Connect Printer Setup For Windows
Use these instructions to configure an Epson printer with Epson Connect on Windows:
- First, go to the Epson website and click the link to download the Epson Connect Printer Setup Utility.
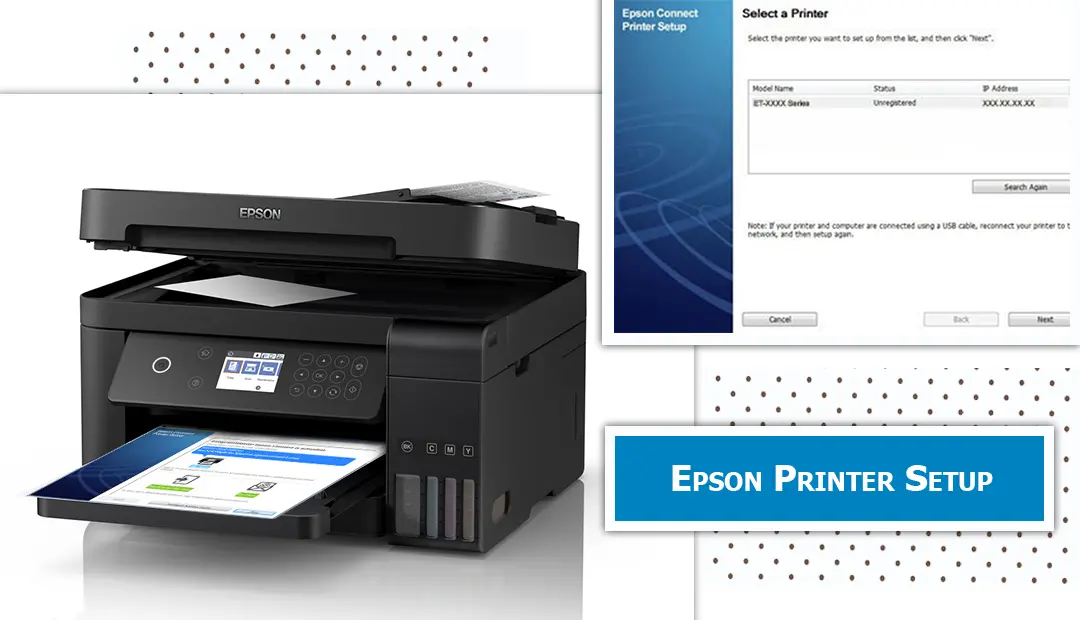
- Run the downloaded program and follow the instructions to link the Epson Connect printer setup application.
- Next, pick a printer from the list and connect it to your network by Wi-Fi or USB.
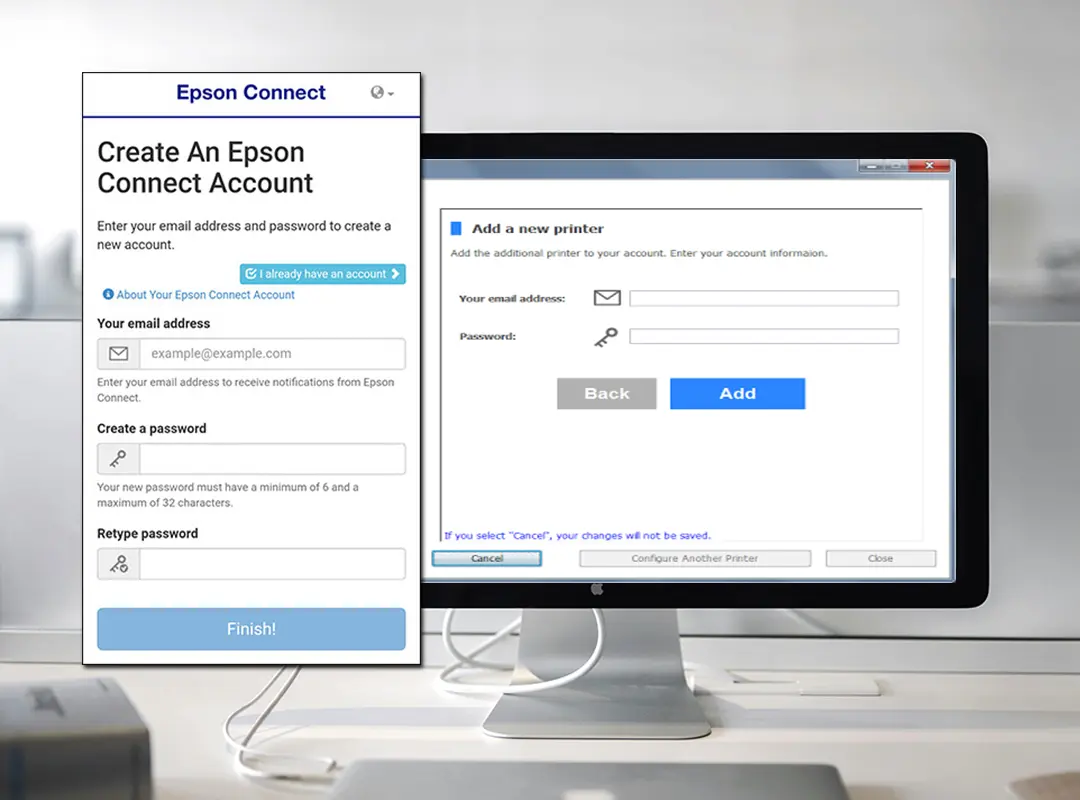
- Now, log into an already-existing Epson Connect account or, if asked, establish a new one.
- Follow the steps to register your printer with Epson Connect in order to use cloud printing services.
- To finish epson wireless printer setup, check your printer’s settings and then perform a print job.
Epson Connect Printer Setup for Mac
To configure how to Connect Epson Printer to Mac, follow these steps:
- Visit the Epson Support website first.
- The Epson Connect Printer Setup Utility Mac should then be downloaded.
- First, open the copied file to link the Epson Connect printer setup program.
- After selecting the printer from the list, connect it to your USB port or Wi-Fi network.
- Create a new Epson Connect account or log in to an existing Epson Printer Login account if prompted.
- Then, in order to utilize cloud printing features, record the printer using the Epson Connect printer setup mac tool.
- Finally, print a test sheet and verify the printer’s settings to complete the setup.
Setting Up Your Epson Printer on Your Chromebook
Use these instructions to configure Epson printer setup for Chromebook:
- First of all link the printer with Chromebook’s network.
- On your Chromebook, click the bottom corner, then the gear symbol to access Settings.
- After this scroll down and choose Advanced > Printing > Printers. Click Add Printer.
- Now Epson printers should be on the list. Click on it and then choose Add.
- At last the printer and the Chromebook will be associated.
- You may now print papers right from your Chromebook.
How to setup epson airprint?
Make sure your Epson printer supports AirPrint before turning it on.
For Connecting my epson printer to my networks network to your Epson printer:
- Navigate to Wi-Fi Setup on the printer.
- Choose Wi-Fi configuration Wizard under Wireless LAN configuration.
- After selecting your network, provide the password.
Printing a network status sheet will confirm the connection.
Open the photo or document on your Mac, iPhone, or iPad.
Select Print by tapping or clicking the Share icon.
From the list, choose your Epson printer (if connected to the same Wi-Fi, it should show up instantly).
After selecting the pages and copies, click Print.
This is the complete Epson AirPrint setup process.
Epson printer setup for android
Use these steps to setup an Epson printer on an Android device:
- First of all allied your device and printer with identical network.
- Get the Epson iPrint app from the app store.
- Open the application.
- Run the app and choose the desired printer.
- From the list, pick the Epson printer you own.
- To test the connection, select a document or picture from your device, then press Print.
- The app will save the printer.
Registering a Printer from Your Computer
To add a new printer or register an existing one, connect Epson printer to computer to register it. Here’s how to carry out each:
New registration:
- Transfer the Epson Connect Printer Setup Utility by visiting the Epson Support website.
- To fix the copied file on the computer, run it and adhere to the prompts.
- Join your printer and PC on the same network.
- Choose New Registration when the Epson Connect Printer Setup Utility opens.
- To register for a new Epson Connect account, follow the instructions. After creating a keyword, pass in your email address.
- Your printer will be perceived by the program. Verify the printer’s details and finish the registration procedure.
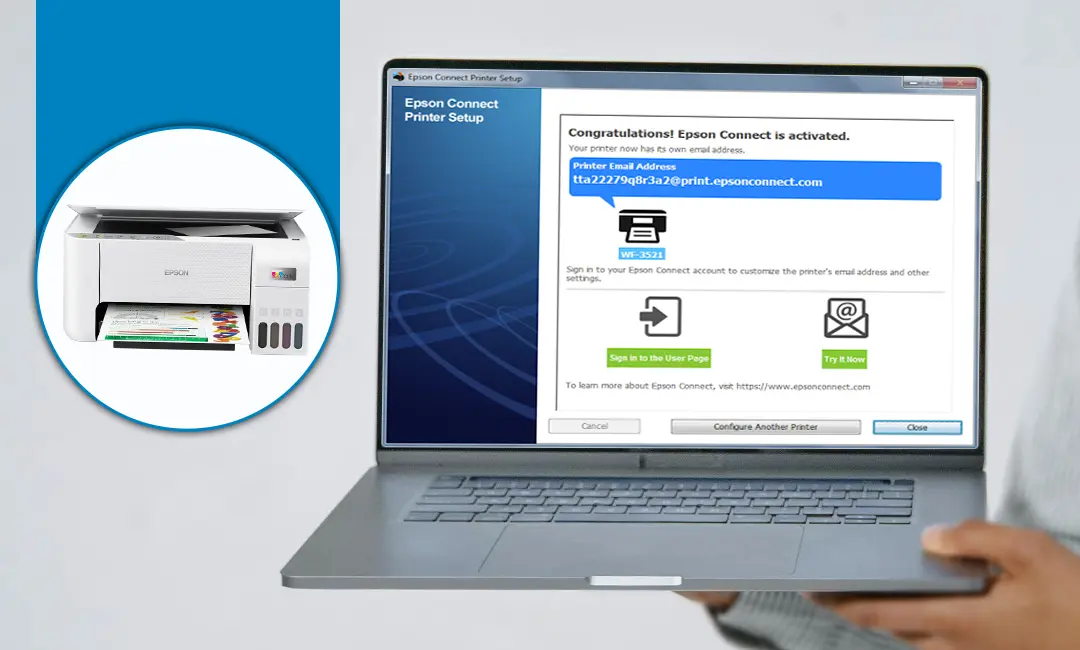
- For remote printing, your printer’s specific email address will be comprised in a validation email that you will get.
Methodology to Install Printer Driver for Epson Printers
You have two options when installing printer drivers for Epson printers: automatically or manually. The methodology for both ways is as follows:
Manual Epson Printer Setup:
- Visit the Epson Support website first.
- Next, enter the printer’s model and choose the relevant operating system.
- Get the latest printer driver now.
- Make sure your printer and PC are connected to the same wireless network or use a USB cable to connect them.
- Double-click the driver file you transferred to start the installation process.
- Make sure you adhere to the instructions when you select the installation options and agree to the terms.
- Then, in the Windows Control Panel, choose Devices & Printers > Add a Printer.
- Next, under System Preferences on Mac, choose Add (+) under Printers & Scanners.
- Select your Epson printer from the list to finish the Epson printer setup.
Epson Printer Setup Automatically
- You may use USB to connect your Epson printer to your computer or Wi-Fi to set it up.
- Windows: If the printer is connected via USB, Windows may detect it and install the required drivers automatically. Navigate to Settings > Devices > Printers & Scanners > Add a Printer if you are connected to Wi-Fi. Windows will automatically transfer and fix the printer driver if you choose your printer.
- Mac: When the printer is connected, macOS will look for and install the required drivers automatically. Drivers will probably need to be downloaded via the Apple Software Update.
- A self-installing driver installer is included with the installation CDs or executable files for specific Epson printers. To have the driver installed automatically, either insert the CD or execute the executable file and follow the instructions.
Note:
- The manual Epson printer setup wirelessly allows you complete control over driver installation, even if you have to download and install the drivers by hand.
- By letting your operating system or Epson’s tools handle driver installation, automatic Epson printer setup is a straightforward choice that reduces the need for human intervention.
FAQ! Need Help?
First, turn on the printer. Subsequently link it to the matched network as your device. Hereafter make sure you have ink and paper. Examine the print queue for any mistakes. Now give the PC and printer a restart. If necessary, update or reinstall the printer driver. To get further help, use the printer’s troubleshooting tool.
First of all locate the registration section by going to the Epson Support page. Now give the model of your printer and the specifics of the issue. As an alternative, get in touch with Epson customer service via phone or email for tailored help with registration-related problems.
We offer thorough assistance and troubleshooting guides for a range of branded printers. For quick fixes, see our frequently asked questions or go to our page for in-depth instructions and fixes.
Firstly use the Epson Connect app or the printer’s online interface. Subsequently find the print job in the queue and choose the cancel option. As an alternative, you can cancel the task straight from the email or printing device.
At first navigate to Printers & Scanners under Settings > Devices. Then to install your wireless printer, click Add a Printer or Scanner, choose it from the list, and then follow the installation instructions. Use an identical network to connect devices.
To access the wireless printer without the internet, you need at least a mobile network. However, without internet connectivity, cloud printing functionalities won’t work.
Make sure the router can reach your printer. Verify that the printer’s WiFi is on and operational. Give the printer and router a restart. Check the network formation to ensure that it isn’t hidden or operating on a different frequency range.
You may connect your phone straight to the printer by using a USB OTG (On-The-Go) cord. Install the required printer app from the app store, such as Epson iPrint. To customize and print, adhere to the app’s instructions.
Go to the WiFi settings on the printer’s control panel and choose Wi-Fi Direct. Turn on the functionality and follow the on-screen directions to establish a direct Wi-Fi Direct connection between your device and printer.
Basic printing may be done without a wireless printer being linked to the router. It may establish a direct WiFi linking with your device. On the other hand, cloud printing and network-wide access require a router.
Ensure that the printer is on and allied to the computer or network appropriately. Inspect for driver or network faults. Restart the computer and the printer. If required, update or restore the printer driver.
You may add new features, boost performance, and fix compatibility problems by upgrading the printer driver. Use the Epson software update tool or check the Epson Support page for driver updates. You can also check how to setup wifi epson printer.
Check out the Epson Support website. Choose your operating system, enter the model of your printer, and download the most recent driver. To upgrade the printer driver, adhere to the installation instructions.
Your epson printer wifi setup may be set up on several different PCs. Install the printer driver on each computer after connecting them all to the printer via a network or USB connection. ensure that every machine is allied to the identical network for network printers.
Only when necessary—for example, if you see problems with print quality, such as streaks or missing colors—should you clean the printheads. Frequent cleaning is not necessary and might encourage using too much ink. For information on suggested cleaning intervals or how to setup epson printer, refer to the printer handbook.
Verify that the driver you downloaded is the right one for the particular printer model you own. Go to the Epson Support page and look up your model number.
DISCLAIMER
This is a recognized independent company that enables its users to discover useful information. The content of the services that is image and brand name are only for the reference purpose. This means no other brand can use it unless they obtain the permission as all the rights are reserved by the website owner.
USEFUL LINKS
BLOG