Epson
How to Connect Epson Printer to MAC?
In order to transport digital material into the real world, printers are necessary equipment for both home and office use. Because of their status for trustworthiness and superiority, Epson printers are a popular option for consumers. You’re at the right place if you recently bought an Epson printer and are unsure how to connect it to your Mac. This tutorial explains how to connect epson printer to mac so you can commence printing right away.
How to connect an Epson printer to a Mac step-by-step
1. Unpack and get the printer ready.
It’s crucial to properly configure it before connect epson printer to mac.
- Open the printer’s box: Remove the printer from the box together with all of its parts. Verify that you have everything that is included, such as the power cable, ink cartridges, and user manual.
- Installing Ink Cartridges: After opening the printer cover, insert the ink cartridges into the proper slots. Most Epson printers have color-coded slots to make things easier.
- Load Paper: Fill the input tray with a stack of plain paper after adjusting the paper guides to secure it.
- Power On: After plugging the printer into a power outlet, turn the power knob. Await the initialization of the printer.
2. If applicable, connect the printer to Wi-Fi.
You may print wirelessly from your Mac by connecting your Epson printer to network if it supports wireless linking:
- Open the Control Panel for the Printer: To open the printer settings menu, use the knobs or touchscreen interface.
- Choose Wi-Fi Configuration: In the settings, find the Wi-Fi Setup option. This may be referred to as “Wireless Settings” or “Network Settings.”
- Choose Network: From a list of accessible networks, pick yours.
- Enter Keyword: Use keypad or touchscreen on printer to pass in WiFi keyword. Make sure the password is correct to avoid connection issues.
- Verify Connection: As soon as the printer connects to the network, a confirmation message will appear on the control panel.
3. Get Your Mac Ready
To ensure a smooth connection between your Mac and the printer, update your macOS and gather any necessary drivers or software.
- Update macOS: From the Apple menu, choose System Settings > General > Software Update. Install any pending updates to ensure compatibility with your Epson printer.
- Download the software and drivers: Look for your printer model on the Epson Support page. Install the suggested macOS utilities and drivers.
4. Linking a Mac to an Epson printer
It’s time to integrate your printer with your Mac after it has been set up and connected to Wi-Fi.
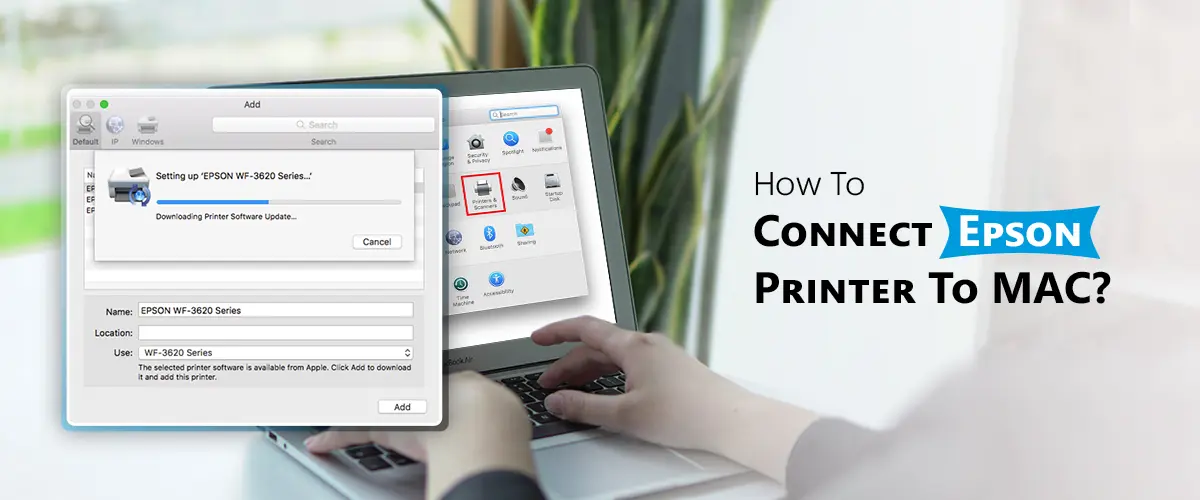
- Go to System Settings: From the Apple menu, select “System Settings.”
- Go to Scanners & Printers: Then select “Printers & Scanners” from the options sidebar.
- Add device: In order to add a new printer, click “+” knob. Your Mac will look for printers that are available.
- Pick the Printer: From the list of devices found, choose Epson printer. If you’re connecting via USB, make sure the printer is connected to your Mac using the correct connector.
- Set up the printer software: Follow the on-screen directions to install any required software or drivers. If necessary, macOS may download these automatically.
- Test Connection: To validate that connect epson printer to mac process is working suitably after adding the printer, print a test page.
5. Solving Typical Problems if can’t connect epson printer to mac
Despite your best efforts to prepare, problems may arise throughout the Epson printer setup procedure. Here are some pointers for these kinds of problems:
- Printer Not Found: Make sure the printer is turned on and connected to the same wireless network as your Mac if your Mac is unable to recognize it. When utilizing USB connections, make sure the cable is securely fastened.
- Driver Issues: If the printer isn’t operating correctly, make sure the right drivers are loaded. Reinstall the drivers from the Epson website if necessary.
- Your Wi-Fi connection is having problems: Move the printer closer to your network to strengthen the signal. Verify that you entered the network name and keyword correctly.
- Print Queue Issues: Select your printer from the “Printers & Scanners” options, then click “Open Print Queue” to clear or restart a print job that has been stuck.
6. Making Use of Epson Printer Features
Additional software tools are available from Epson to improve your printing experience.
- Epson Scan Utility: To conduct scans straight from your Mac, download the Epson Scan utility if your printer has a scanner.
- Epson iPrint App: on print wirelessly from your Apple devices, download the Epson iPrint app on your iPhone or iPad.
- Firmware Apprises: To enhance compatibility and performance, apprise firmware of printers on a steady basis.
Final thoughts
Setting up the printer, connecting it to Wi-Fi, and adding it to your Mac’s list of devices are the simple steps involved in connect epson printer to mac. You can guarantee a smooth connection and take advantage of high-quality printing by following the preceding instructions.
FAQS
Do I need AirPrint to connect my Epson printer to Mac?
Connecting an Epson printer to a Mac doesn’t require AirPrint. Using System Settings or the Epson website, you may manually install Epson printer drivers or software.
How can I connect an Epson printer to Mac via Bluetooth?
Turn on Bluetooth for both your printer and Mac. After pairing them over Bluetooth, select System Settings → Printers & Scanners → Add Printer → Bluetooth to add the printer.
Can I connect an Epson printer to Mac using a router or network?
Yes, you may use a router or Wi-Fi to connect. After connecting the Mac and Epson printers to the same network, choose System Settings → Printers & Scanners → Add Printer.
How do I configure print quality and paper settings from Mac?
On your Mac, launch the Print dialog, select “Show Details,” and then use the “Quality” or “Paper Handling” choices to change the paper size, media type, color mode, and print quality.
Recent Post
Recent Posts
DISCLAIMER
This is a recognized independent company that enables its users to discover useful information. The content of the services that is image and brand name are only for the reference purpose. This means no other brand can use it unless they obtain the permission as all the rights are reserved by the website owner.
USEFUL LINKS
BLOG